Installing the WP Mail SMTP Plugin
Whatever SMTP service you choose, you’ll need to have the WP Mail SMTP plugin installed on your site. This lets you switch WordPress from using the built-in PHP mail() function to using your SMTP service.
First, install and activate the WP Mail SMTP plugin. If you’re not sure how, see our step by step guide on how to install a WordPress plugin.
Next, click on WP Mail SMTP in your WordPress dashboard to configure the plugin settings.
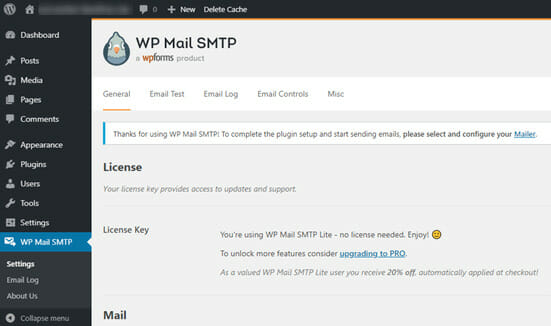
You will need to start by entering the name and business email address you want your site’s emails to come from. Make sure you use the same email address here that you’ll be using for your SMTP mailing service.
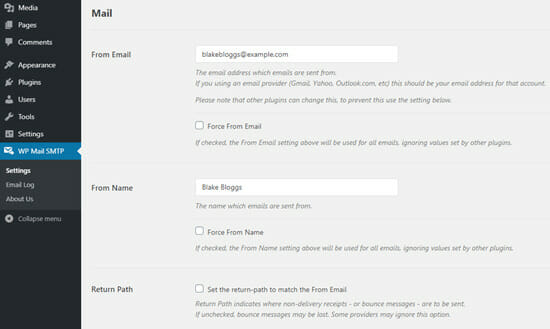
You can choose to force emails to use this name and email address, even if other plugins, like WPForms, have different settings. WP Mail SMTP will override the other plugins’ settings.
After that, you need to choose an SMTP mailing service for your site.
For this tutorial, we’re going to set up SMTP using SendLayer. If you’d prefer to use Gmail or Office365, then we’ve got instructions on those later in this article as well.

To finish setting up WP Mail SMTP, you’ll need to create an account with SendLayer. We’ll move on to that next, and then come back to finalizing the setup on WP Mail SMTP.
Sending WordPress Emails using SendLayer
SendLayer is a reliable email service provider. They let you send a large number of emails with high deliverability.
You can use SendLayer to send up to 200 emails for free, which is more than enough for most small websites to get started.
These could be emails from your contact form, new user account details, password recovery emails, or any other emails sent through your WordPress site.
First, you’ll need to go to the SendLayer website to create an account. On the Pricing page, click on the ‘Take SendLayer for a free trial (send up to 200 emails)’ link to set up your account.

Once you’ve created an account, you’ll see your SendLayer dashboard, which looks something like this:
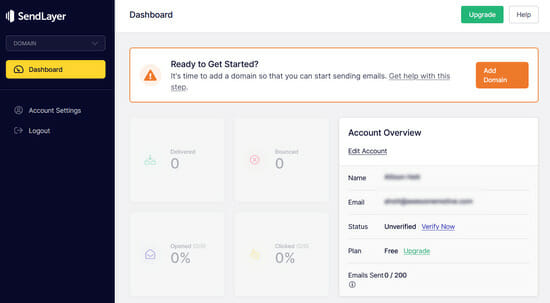
Now that you have a SendLayer account, let’s set up your email provider with WordPress.
Connecting Your WordPress Website with SendLayer
Before you can send emails with SendLayer, you need to authorize your domain.
This proves to email servers that you are the confirmed owner of your sending domain and that your emails are sent from a legitimate source.
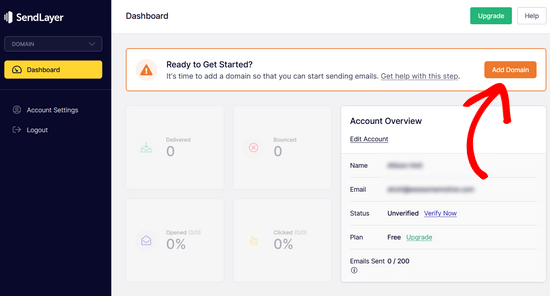
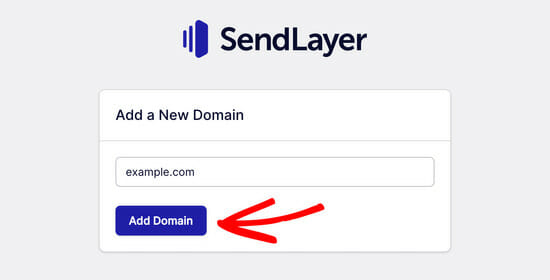
To authorize your domain, click the orange ‘Add Domain’ button from the SendLayer dashboard.
On the next page, simply type your domain name into the field provided.
Then, click on the ‘Add Domain’ button.
Note: With other mailing services like Sendinblue, you need to set up a subdomain for your website first. But, SendLayer will automatically add the subdomain to the sender domain’s DNS records. So, you don’t need to add an additional subdomain when registering the domain.
Once you’ve added your domain, SendLayer will generate 5 DNS records, which are unique to your domain.
These lines of code let SendLayer authorize your domain name.
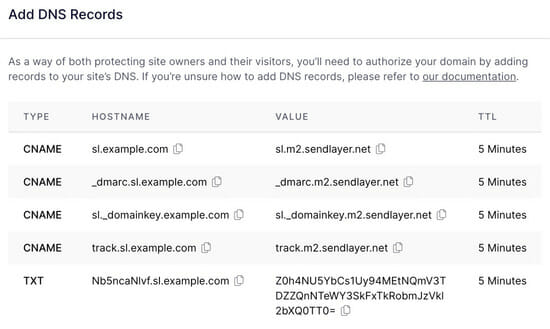
You’ll need to add these DNS records your WordPress site. This may seem complicated, but all you need to do is copy and paste them into the right place.
First, open up a new browser tab and log into your WordPress hosting account. For the sake of this tutorial, we’ll demonstrate on our example hosting account on Bluehost.
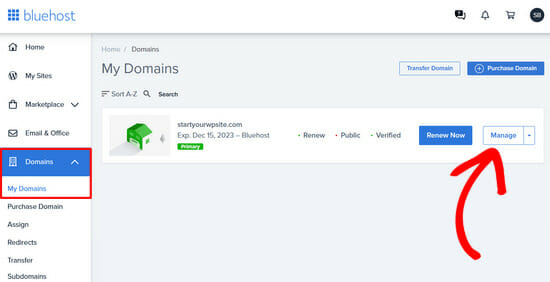
Next, you need to find your domain and open up the DNS records.
In Bluehost, you do this by going to Domains » My Domains. Then, click the ‘Manage’ button next to your domain.
Note: If you’re using other hosting companies or if your DNS is managed at domain registrar like Domain.com, Network Solutions, or GoDaddy, then follow their respective instructions.
On the next page, click the ‘DNS’ tab. Here, you’ll need to add the 4 CNAME records and 1 TXT record that were provided by SendLayer.
First, scroll down to find the CNAME section of your DNS records. It will look something like this:
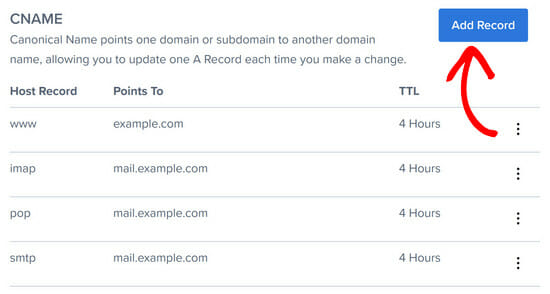
Then, click ‘Add Record’.
Complete the first record as follows:
Host Record: sl
Points To (Value): Copy this from SendLayer.
TTL: 4 Hours (min)
Tips: Host Record might be called Host or Name by your web host. When adding the Host Record, be sure to only add the subdomain (sl), since Bluehost will add your domain automatically. You may need to add the Record Type, which would be CNAME.
Once you have added the first record, click on the ‘Save’ button to store your changes.
Next, continue adding the 3 other CNAME records by repeating the steps above.
After that, scroll down again to find the TXT section of your DNS records. Here, you need to add the TXT record from SendLayer.

Click the ‘Add Record’ button and complete it as follows:
Host Record: sl
TXT Value: Copy this from SendLayer.
TTL: 4 Hours (min)
Once you’re done, go ahead and save that record too.
Note: TXT Value might also be called TXT data: it’s the long piece of code in the last row of the SendLayer details. TTL could be 24 hours or 86400 seconds (both are equivalent to 1 day). If you’re using GoDaddy, set it to 1 hour.
After you’ve added your records, go back to SendLayer and check the box next to ‘I have added these DNS records and am ready to proceed.’ Then, hit the ‘Verify DNS Records’ button.

It may take 24-48 hours before SendLayer is able to verify your records, but it’s often much quicker.
If nothing happens when you click that button, the records can’t yet be verified. You can check again later to see if they’ve been verified by going to Settings » DNS Records & Settings from your SendLayer dashboard.
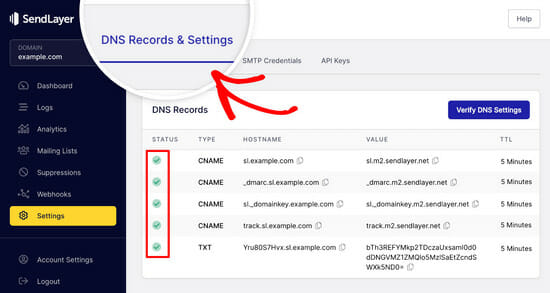
Here, you’ll find a list of all of your DNS records in one place. Once your domain has been successfully authorized, you’ll see green checkmarks next to each DNS record in the ‘Status’ column.
You can keep going with this tutorial while you wait for the authorization to take place.
Finishing Setting Up WP Mail SMTP to Use SendLayer
Now, go back to your WP Mail SMTP settings in your WordPress dashboard. You should have already entered the From Email and From Name, but if not, you can do that now.
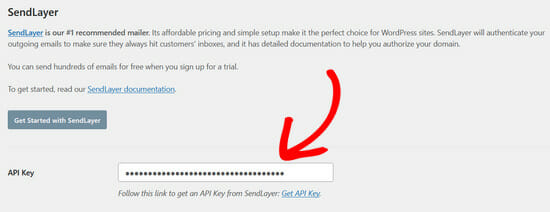
Next, click on ‘SendLayer’ for your mailer.
After that, you’ll need go to your SendLayer account to find your API key.
From the SendLayer dashboard, simply go to the Settings » API Keys page. Here, you’ll see a default API key that was generated when you authorized your domain in SendLayer.
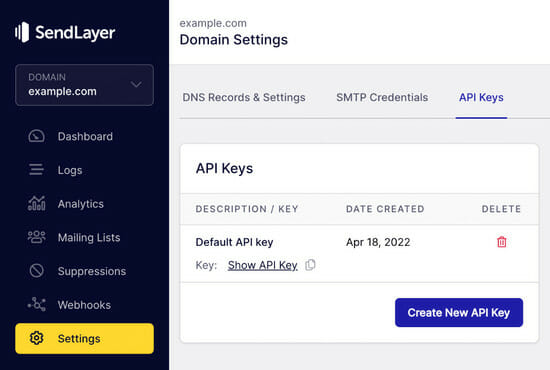
You can copy the API key from this page by clicking on the copy icon.

With that done, you can head back to your WP Mail SMTP settings and paste the API key into the field provided:
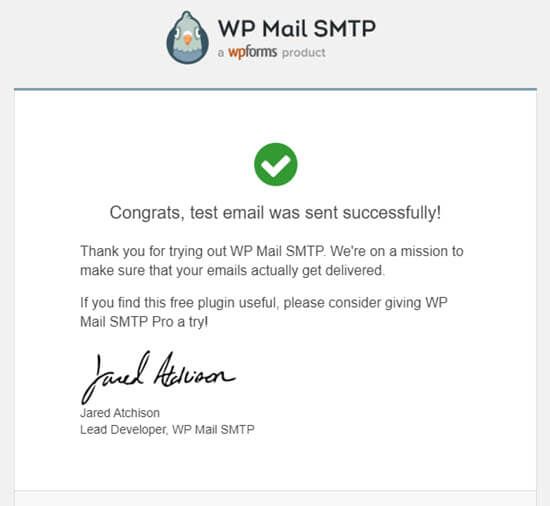
Congratulations. You’ve now set everything up. The final step is to send a test email to make sure everything is working.
Go to the ‘Email Test’ tab of WP Mail SMTP and enter an email address to send an email to. This will default to the site’s admin email. Click ‘Send Email’.
You should see the message ‘Test HTML email was sent successfully!’ Check your inbox to see whether it’s arrived. It’ll look like this:
Note: If your SendLayer account isn’t yet activated, you’ll get the message: [permission_denied]: Unable to send email. Your SMTP account is not yet activated.